 A few weeks a go, I posted on how to make a new sidebar in minima template. I changed two sidebar template into three sidebar template. That posting has many comments from the readers. They gave the comments in shout box or in comment form. Their comments are variety. Some readers told their happiness because they could make their blogs into three column, congratulation readers. But, some of them are still curious and need more for that posting. Below is one of the comments from curious and unsatisfied readers;
Kang…How can I put the main column in the middle or between left and right sidebar??? Please help me …Thanks.
Kang Rohman : Hmmmmmmmmm…wanna know how to do that?...well that’s secret!
Reader : Huh..Kang rohman is stingy
Kang Rohman : Just kidding
Reader : Please…
Kang Rohman : Ok…
To make a new sidebar isn’t difficult, you only need to place the float code in the left and add the padding-right isn’t so that the left column and the main column don’t touch each others. You are confused, aren’t you? Well, I make you confused
For you who want to place the sidebar column in the left, please read this article first because the present article is the continuation of that article. I am afraid that if you directly read this article, you will get more confused.
Before I continue to tell you about this topic, I suggest you not to use your main blog to do this tutorial but the use the other or trial blog. Why? In order to anticipate the unexpected result. If this experiment doesn’t work well, it will not damage your main blog…right? But only damaging your trial blog.
Ok, my friends..let’s start. I assume that you have made or created a new column. First, never give a check for Expand widget Template box. If you do it, it will give you a very complicated and confusing widget code.
In my previous posting, I wrote this code;
/* Outer-Wrapper
------------------------------------------ */

#outer-wrapper {
width: 840px
margin:0 auto;
padding:10px;
text-align:left;
font: $bodyfont;
}


#main-wrapper {
width: 410px;
float: left;
word-wrap: break-word; /* fix for long text breaking sidebar float in IE */
overflow: hidden;     /* fix for long non-text content breaking IE sidebar float */
}


#sidebar-wrapper {
width: 220px;
float: right;
padding-left:10px; /* yg ini tambahan juga biar tampak ada jarak sela */
word-wrap: break-word; /* fix for long text breaking sidebar float in IE */
overflow: hidden; /* fix for long non-text content breaking IE sidebar float */I order to make different result with the previous posting. I mean that the column isn’t in the right but in the left, you should only change the code a little. Please, look at the red code below and change them into:} #newsidebar-wrapper { width: 180px; float: right; padding-left:10px; word-wrap: break-word; overflow: hidden; }
#newsidebar-wrapper {

width: 180px;

float: left;

padding-right:10px;

word-wrap: break-word;

overflow: hidden;

}
If you see the blue codes, you only need to change the two line code and don’t change the others code. After changing it, don’t forget to save the template.
Next, go to the bottom of your template and find body. In the previous posting, I suggested you to put the code like this ;
<div id='sidebar-wrapper'> <b:section class='sidebar' id='sidebar' preferred='yes'>
<b:widget id='Profile1' locked='false' title='About Me' type='Profile'/>
<b:widget id='BlogArchive1' locked='false' title='Arsip Blog' type='BlogArchive'/>
</b:section>
</div>
<div id='newsidebar-wrapper'>
<b:section class='sidebar' id='newsidebar' preferred='yes'/>
</div>
Now, if you want to place the new sidebar in the left side, then you have to move that sidebar code above the main code (posting). The whole codes will look like the following:
-
<div id='newsidebar-wrapper'> <b:section class='sidebar' id='newsidebar' preferred='ye'/'> </div> -
<div id='main-wrapper'>
<b:section class='main' id='main' showaddelement='no'>
<b:widget id='Blog1' locked='true' title='Posting Blog' type='Blog'/>
</b:section> </div>
<b:section class='sidebar' id='sidebar' preferred='yes'><b:widget id='Profile1' locked='false' title='About Me' type='Profile'/> <b:widget id='BlogArchive1' locked='false' title='Arsip Blog' type='BlogArchive'/></b:section></div>
Remember to click save template after finishing it. Finally, view the result…..what do you think? do you like your new template? I think so.
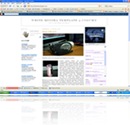
It is easy, isn’t it? Hopefully you understand my explanation and if you want to see the sample blog with the sidebar in the left and right, you can see it here.
No comments:
Post a Comment